
Why machines change the game
Machine knitting shifts the focus from manual endurance to creative fluency. Hand knitting requires constant physical rhythm and tension management, which can limit production volume. A knitting machine handles the repetitive mechanics, allowing you to knit flat panels or tubes at a pace that feels almost effortless once you learn the basics.
This shift unlocks a different kind of skill: reading patterns. When you can produce fabric quickly and consistently, you start to see your knitting in terms of structure rather than just stitch count. You begin to "speak fluent knit," understanding how gauge, stitch type, and machine settings interact to create specific textures and shapes. It is less about memorizing every move and more about understanding the language of the fabric.
The consistency of machine-made fabric also makes troubleshooting easier. On a machine, errors often show up immediately as uneven tension or visible breaks in the pattern, making it easier to fix them before they ruin the project. This immediate feedback loop accelerates the learning process, helping beginners build confidence faster than they might with needles alone.
Top picks for knit fluent beginners
Reaching a point where you can knit without constantly checking the pattern is the real milestone. It is the difference between struggling with the mechanics of the machine and actually making something you want to wear. For beginners, the best machines are those that remove the guesswork from basic stitches while allowing enough flexibility for simple sweater shapes.
We focused on entry-level models that balance ease of use with the versatility needed to create basic garments. These picks prioritize straightforward operation, reliable stitch formation, and the ability to handle the standard yarn weights used in most beginner patterns.
The goal is to build confidence. When the machine handles the tension and stitch formation consistently, you can focus on the shape of your project rather than fighting the hardware. This approach helps you move from following instructions step-by-step to understanding how the machine works, which is essential for long-term enjoyment.


As an Amazon Associate, we may earn from qualifying purchases.
Understanding Gauge, Width, and Carriage Types
Choosing a machine isn't just about brand loyalty; it’s about matching the hardware to the projects you actually want to make. Think of gauge, width, and carriage types as the grammar of machine knitting. Get these wrong, and your "sentences"—sweaters, scarves, or intarsia panels—will look like gibberish. To become knit fluent, you need to understand how these three technical pillars dictate what your machine can physically produce.
Gauge Determines Yarn Weight
Gauge refers to the number of needles per inch on the machine bed. This is the most critical specification because it locks you into a specific yarn weight. A 4.5mm gauge (often called "standard" or "4mm") is the sweet spot for beginners. It handles worsted-weight yarns, which are affordable, widely available, and forgiving for learning tension.
If you choose a 2.5mm or 3mm gauge (chunky), you are restricted to bulky yarns. These machines knit fast but are less versatile for garments that need to drape well. Conversely, a 6mm or 7mm gauge (fine) requires lace or fingering weight yarn. While great for lightweight summer tops, fine gauge machines are slower and more prone to breaking delicate threads, which can be frustrating for a new user.
Bed Width Limits Project Size
The working width of the machine bed determines the maximum width of your knitted fabric. Most standard home machines have a 200-needle bed, which yields about 20-22 inches of fabric width. This is sufficient for most adult sweaters if you knit them in panels and sew them together.
However, if you plan to knit wide scarves, blankets, or one-piece tunics without seams, you’ll need a wider machine, such as a 280-needle or 360-needle model. Wider machines are significantly heavier, more expensive, and require more storage space. For a beginner focused on learning basic construction, a standard 200-needle width is usually plenty.
Carriage Types Control Stitch Patterns
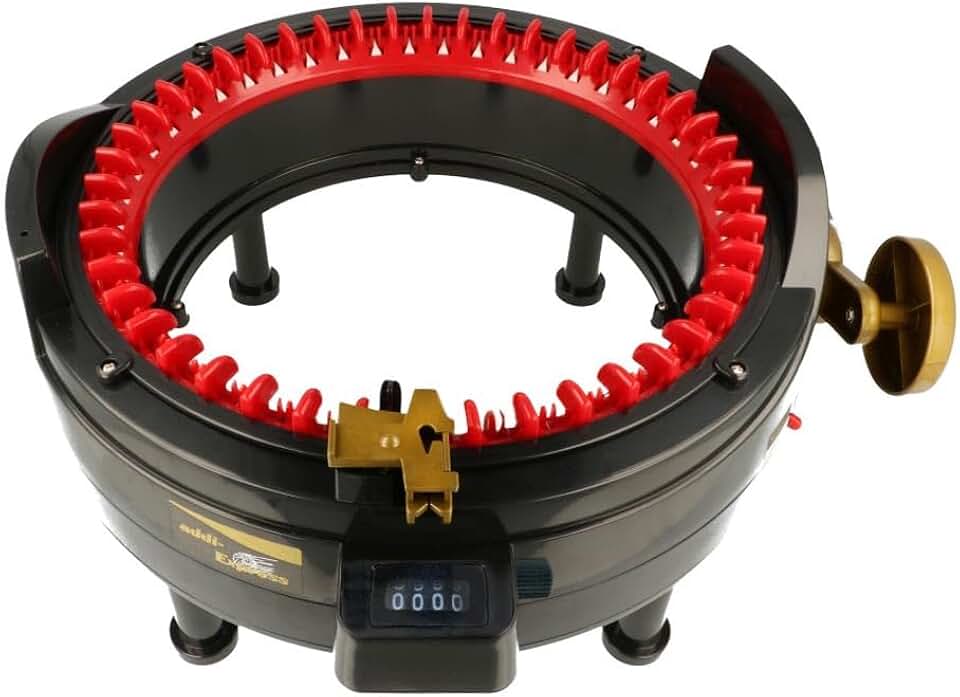
The carriage is the handheld device you push back and forth across the needles. The type of carriage you buy determines the complexity of the stitches you can create.
- Single Carriage: This basic carriage knits plain stockinette and basic ribbing. It’s the cheapest option and perfect for learning the mechanics of knitting flat panels. It cannot handle complex colorwork or textured stitches.
- Double Carriage: This setup uses two carriages working together. One knits the front loop, the other the back, allowing for complex intarsia patterns, fair isle colorwork, and textured stitches like cables or moss stitch. If you want to make patterned sweaters, a double carriage is essential.
Comparison of Key Machine Features
The table below compares three common entry-level machine setups. Note that specific models vary by region and year, so always verify current availability.
| Feature | Single Carriage Setup | Double Carriage Setup | Wide Bed (280+ Needles) |
|---|---|---|---|
| Gauge Compatibility | 4.5mm (Standard) | 4.5mm (Standard) | 3mm-6mm (Varies) |
| Max Fabric Width | ~20 inches | ~20 inches | ~28-32 inches |
| Complexity | Stockinette & Rib only | Intarsia, Fair Isle, Cables | Varies by carriage |
| Best For | Scarves, simple panels | Patterned sweaters, garments | Blankets, wide tunics |
| Skill Curve | Beginner | Intermediate | Intermediate to Advanced |
Mastering intarsia on the machine
Intarsia is the art of knitting with separate balls of yarn for each color block, creating solid shapes without the floats of stranded knitting. On a machine, this technique requires a bit more setup than hand knitting, but it produces clean, professional results perfect for modern sweaters. The goal is to keep each color isolated in its own section of the needle bed, preventing tangles and ensuring sharp edges.
The secret to success lies in managing your yarn supply. Instead of letting balls of yarn roll around, secure them to the machine’s frame or use small weights. This prevents the yarn from twisting and tangling as you work back and forth. Think of each color as a separate thread in a tapestry; they should never cross over each other unless you are intentionally creating a join.
1. Set up the needle bed
Start by knitting a few rows in your main color to establish a stable base. As you approach the first color change, drop the main yarn and pick up the new color. Make sure the new yarn is positioned correctly in the tension dial to match the gauge of the main yarn. This initial setup ensures that your color blocks will sit flat and even.
2. Work the color blocks
Knit across the row with your new color, keeping the old yarn loose but out of the way. When you reach the next color change, drop the current yarn and pick up the next one. Always twist the two yarns together at the back of the work where they meet. This twist locks the colors in place and prevents holes from forming between the blocks.
3. Finish and weave in ends
Once you have completed your intarsia pattern, knit a few rows in a solid color to stabilize the fabric. Cut the yarns, leaving tails long enough to weave in later. Use a tapestry needle to weave these ends into the back of the work, hiding them securely. This final step gives your project a polished, store-bought finish.
Secure each ball of yarn to the machine frame or use small weights to prevent tangling. This keeps the yarn manageable and prevents the balls from rolling off the table.
Knit a few rows in your main color, then drop it and pick up the new color at the change point. Ensure the new yarn is in the correct tension dial position to match the gauge.
Knit across with the new color, keeping the old yarn loose. Twist the two yarns together at the back of the work where they meet to lock the colors and prevent holes.
Essential accessories for new knitters
A knitting machine is only as good as the tools guiding it. To move from confused beginner to knit fluent, you need a few specific accessories that handle the heavy lifting. These items solve the most common beginner frustrations: tangled yarn, dropped stitches, and awkward tension.
Yarn guide and tension dial
The yarn guide is a simple plastic or metal piece that sits between your yarn cone and the machine. It keeps the yarn from tangling or catching on the machine’s frame. Without it, your yarn will knot up constantly, stopping your progress. The tension dial controls how tight the stitches are. Start with a medium setting (usually 3 or 4) and adjust only if the fabric looks too loose or tight.
Stitch pick and latch hook
These two tools are your safety net. A stitch pick is a small, sharp hook used to lift dropped stitches back onto the needles before they unravel into a mess. A latch hook is slightly larger and used to transfer stitches between needles or fix broken loops. Keep both within arm’s reach; you will use them more than you expect.
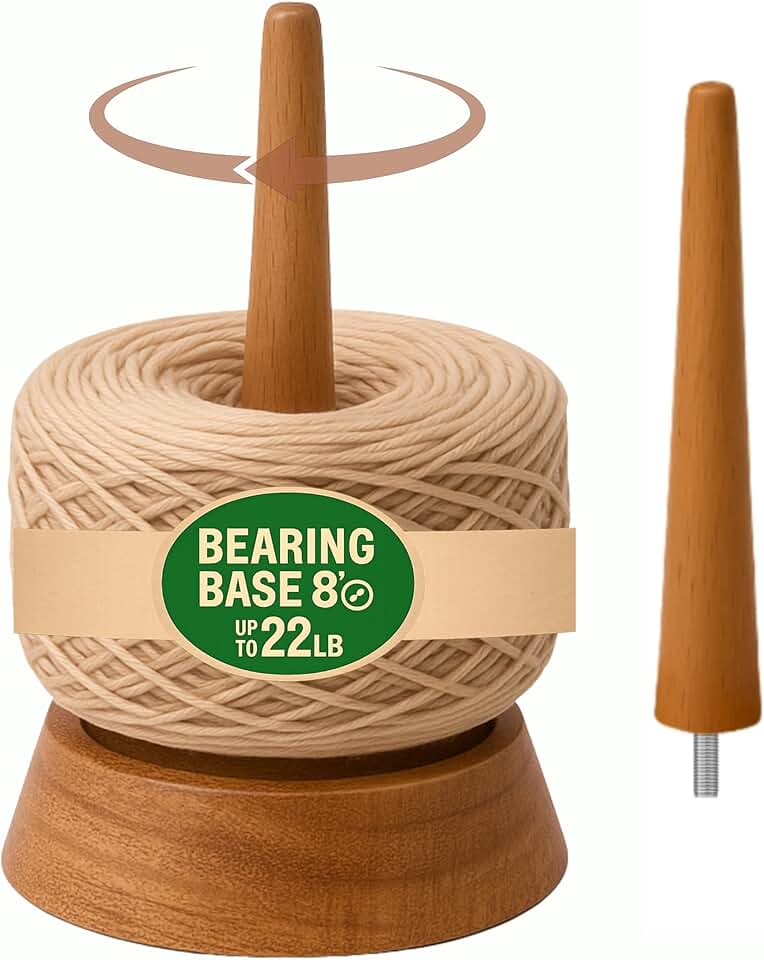
Weighted yarn cone holder
Gravity is your friend in machine knitting. A cone holder keeps your yarn ball upright and steady, preventing it from rolling off the table. Some beginners use a simple weight or a dedicated stand. Consistent tension from a stable cone makes the difference between smooth fabric and uneven, bumpy rows.
Raveling tool
Also known as a seam ripper, this small tool is essential for correcting mistakes. If you knit a row wrong, you can use the raveling tool to carefully unpick the stitches without damaging the yarn. It’s much safer than using scissors or your fingernails.
Needle bed comb
This wide-toothed comb helps you push stitches evenly across the needle bed. It ensures that every stitch is properly seated on the needle before you start knitting. Skipping this step can lead to missed stitches and holes in your fabric.

As an Amazon Associate, we may earn from qualifying purchases.
Frequently asked: what to check next
Machine knitting can feel like learning a new language, but the goal is to become "knit fluent"—reading patterns and stitches intuitively rather than memorizing code. Here are the most common questions beginners ask when starting their journey.
No comments yet. Be the first to share your thoughts!